Setting up an e-commerce website with Magento is not too complicated, the install and global
configuration are pretty easy and shouldn’t cause too many problems. For
more advanced configuration and template tweaks, things can get a bit
more hectic, but with the following Magento tips it should already get a
little easier.
1. Add a custom “add to cart” button on CMS pages
Sometimes you’ll want to show a different presentation of your
products or introduce it on a CMS page for some reason. If you want to
do that it’s actually not so complicated, in your page editor, just add
the following HTML code where you want it to appear in the page.
|
1
|
<buttononclick=”location.href =’{{config path=”web/unsecure/base_url”}}/checkout/cart/add?product=1&qty=1′”>Buy It Now</button>
|
Save the page and refresh the cache. Now if you open the page in you
should be able to see “Buy It Now” button. When clicked it adds 1
product with ID=1 to your shopping cart.
To make it a little more advanced, you can add the quantity of
products you want to let the customers add, in that case use this code
(example for five products).
|
1
|
<buttononclick=”location.href =’{{config path=”web/unsecure/base_url”}}/checkout/cart/add?product=1&qty=5′”>Buy 4 Get 1 Free</button>
|
Source of the tip
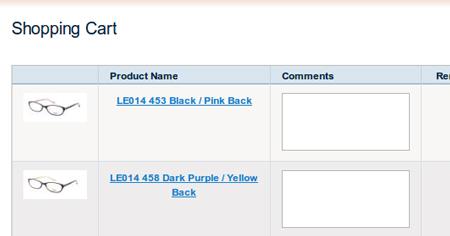
2. Add custom comment box to each product on the cart page
If you create more than one website with Magento for clients, you get
90% chances that one of your clients will ask to have a comment box for
products on orders. It makes sense, the client could have a specific
requirement or question regarding the order or the shipping and a
comment box is the best way to let him comment.
This tip is a bit long, so take a look at it on Magento Coder’s website.

3. Hide shopping cart sidebar when it is empty
Having the shopping cart in the sidebar or elsewhere on the page is
very useful for your visitors. However, displaying the shopping cart
when the user has nothing in it is not necessary. To hide the cart in
the sidebar, try the following steps.
1. Open: app/design/frontend/default/<your template>/template/checkout/cart/sidebar.phtml
2. Look for the following div (normally on line 32):
|
1
|
<code><divclass="box base-mini mini-cart"></code>
|
3. Add this php code right before that opening div tag
|
1
|
$_cartQty1=$this->getSummaryCount()
|
4. Add this php code to the bottom of the file
endif
Source of this tip
4. Add Facebook Like on a product page in Magento
Having a Facebook button on your product is an easy way to take
advantage of the power of Facebook. If a user clicks on it, he shares
your page with all his friends.
To add this button, add the following code anywhere in this template file: app/design/frontend/theme/theme/template/catalog/product/view.phtml
|
1
|
<a name="fb_share"type="button"></a>
|
|
2
|
<script src="http://gccde.com/downloads/blog/1/20121010/FBShare.jpg"type="text/javascript">
|
|
4
|
<?phpelseif($_share=='facebook_like'): ?>
|
|
5
|
<script src="http://gccde.com/downloads/blog/1/20121010/alljs#xfbml1.jpg"></script><fb:like show_faces="true"width="450"></fb:like>
|
5. Add a language pack as a store view
Creating a store view for a language is not too hard, but you
shouldn’t have any problem doing it in Magento if you follow these
instructions.
1. Download the language pack you need and then unpack it to your Magento install folder. It copies two folders: one goes to appdesignfrontenddefaultdefaultlocale and the other one to applocale.
2. Go to System > Configuration in your admin. On the
left top corner in Current Configuration Scope dropdown box, you can see
Default Config, and Main Store in English store view.
3. Now let’s go and add the French store view. Under the dropdown box, there’s Manage Stores link or you can directly go to System > Manage Stores. Click the Create Store View link on top right, and type these in store view information form:
Store: Main Store
Name: French
Code: french
Status: Enabled
Sort order: 0
4. Save, go back to System > Configuration. In Current Configuration Scope dropdown box, you now see there’s French store view. Click that link.
On Locale options tab on the left, uncheck the “use website” checkbox then change the locale to French (France). Save.
Now you can have your website in French.
6. Tip to hide the price of the product if Magento user is not logged in
Tier pricing is great, but you don’t want to display every price to
every customer. To show tiered pricing to logged in visitors only, go to: app/design/frontend/default/default/template/catalog/product/view/tierprices.phtml
On this file, add this PHP function
|
1
|
<?phpif(Mage::getSingleton('customer/session')->isLoggedIn()): ?>
|
The above function should be added before the following piece of code
|
1
|
<?phpif(count($_tierPrices) > 0): ?>
|
Then add this code at the end.
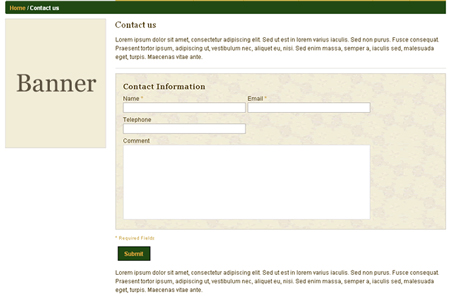
7. Add a contact form to a Magento CMS page
Of all Magento tips, this one solve a very frequent problem. Your
clients will want to get a contact form to which they can add bits of
text, they’ll also want to have the breadcrumb menu shown for that
contact page. Out of the box, the Magento contact form doesn’t allo
this, to do it you just have to follow this procedure.
Go to your CMS> Manage Pages interface
Once there, input your HTML as you normally would on any other page
Once you are happy with HTML part, add this lines:
|
2
|
{{block type="core/template" name="contactForm" form_action="/contacts/index/post" template="contacts/form.phtml"}}
|
|
3
|
<!– END OF CONTACT FORM –>
|
Source of this Magento tips

8. How to Remove Credit Card Information From Sales Email
Depending on what payment system you allow to your visitors, Magento
sends the credit card number openly by email, which is not secured at
all. Here is a Magento tip to avoid displaying that info in emails.
1. Open the file app/design/frontend/default/your_theme/template/payment/info/cc.phtml
2. Find the lines that read:
|
1
|
<?phpecho$this->__(’Credit Card Number: xxxx-%s’,$this->htmlEscape($this->getInfo()->getCcLast4())) ?><br/><?phpecho$this->__(’ExpirationDate: %s/%s’,$this->htmlEscape($this->getCcExpMonth()),$this->htmlEscape($this->getInfo()->getCcExpYear())) ?>
|
3. Comment this code out, so it looks like this:
|
1
|
<!–<?phpecho$this->__(’Credit Card Number: xxxx-%s’,$this->htmlEscape($this->getInfo()->getCcLast4())) ?><br/><?phpecho$this->__(’ExpirationDate: %s/%s’,$this->htmlEscape($this->getCcExpMonth()),$this->htmlEscape($this->getInfo()->getCcExpYear())) ?>–>
|
4. Save the file.
Source of this tip
9. Debug your layout in Magento
Your layout files and templates are not showing up on front? You can
see what’s going on with your layouts using Mage::log() method in your
controller. The code below would log loaded layout handles and compiled
layout update string into var/log/layout.log file.
Here is how to enable the debug mode in your index.php file.
|
01
|
publicfunctiontestAction()
|
|
05
|
//Somewhere within controller action after loadLayout() was called
|
|
06
|
//The code below logs loaded layout handles to “var/log/layout.log” file
|
|
08
|
$this->getLayout()->getUpdate()->getHandles(),
|
|
12
|
//The code below logs merged layout to “var/log/layout.log” file
|
|
14
|
$this->getLayout()->getUpdate()->asString(),
|
10. Display a product’s category name
When on a product page in Magento, it can be a bit tricky to display
the name of the category the product is in. Actually it’s not that hard,
all you have to do is to follow these Magento tips.
The template file you’ll have to edit is this one catalog/product/view.phtml
and add the next code where you want to display the category
|
1
|
<?php$categories=$_product->getCategoryIds(); ?>
|
|
2
|
<?phpforeach($categoriesas$k=>$_category_id): ?>
|
|
3
|
<?php$_category= Mage::getModel('catalog/category')->load($_category_id) ?>
|
|
4
|
<a href="<?php echo $_category->getUrl() ?>"><?phpecho$_category->getName() ?></a>
|
Have any Magento tips to share?
The Magento tips mentionned in this article are only a few, but they
really helped in creating my Magento sites and templates. Do you work
frequently with Magento? If so, do you have any cool Magento tips you
could share?
 10 problems you can solve with these Magento tips


